


 24/7 Emergency Service
How To Build Containments
5/20/2019 (Permalink)
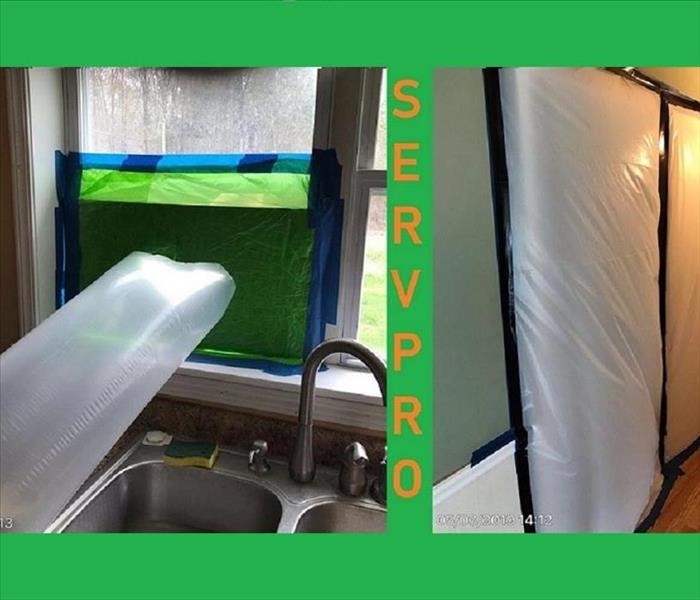
Containments are also referred to as critical barriers of plastic sheets that we put up around windows and doors. Our technicians may put up containment throughout your home for a couple of different reasons.
1. To isolate an area for drying
2. To minimize cross contamination from affected areas to unaffected areas
3. To confine dust and debris in a demo room or area.
Setting up a containment is a multi step process.
Step 1: Move and Protect Furniture
- Move furniture to the center of the room
- Cover with a plastic sheet to protect from dust/debris.
Step 2: Position AFD (air filtration device)
- An air filtration device is used to establish negative air pressure to contain contaminates and dust.
Step 3: Install Critical Barriers on Windows
- Use painters tape on painted areas
- Square up plastic to painters tape
- Secure plastic with duct tape
*DO NOT allow duct tape to touch the painted surfaces, as it will take off the paint
Step 4: Install Critical Barriers on Doors
- Door installation is the same as window with 1 extra step
- Cut a "T" flap in plastic panel: Place duct tape along the center and across the bottom resembling an upside down "T"
- Cut the center of the duct tape to create an open to go in and out of the containment.
- Place a 2nd sheet of plastic over the 1st sheet at the top of the door and secure with duct tape
- Allow 2nd sheet to freely open and close door
Step 5: Position Lay-Flat Ducting
- Connect ducting to AFD (air filtration device)
- Unroll to barrier where you will be exhausting, for example window barrier.
- Cut an “X” in the barrier and hold ducting up to the hole just cut
- Cut ducting about a foot beyond opening, so ducting extends about a foot outside
- Tie up a small amount of the end of the ducting to create back pressure which helps inflate ducting
Step 6: Turn on AFD
- Turn on AFD to a low or minimum speed
- Ducting should inflate
Step 7: Check Pressurization
- Visually see critical barriers pulling into contained area
- Use a manometer to meet the recommended -.02 pressure differential within the contained area
- Make adjustments to AFD speed and barriers, if needed
**DO NOT set AFD on high, this could cause barriers to collapse
Step 8: Complete Work
Step 9: Take down equipment once all testing is completed
Have Questions?
Call SERVPRO of North Rensselaer/South Washington Counties- (518)677-3444